...Unfortunately, I'm not the lucky lady who gets to go. Somehow, my parents have neglected to ever take me there... Which I might or might not be slightly upset about. But hey, it's not like I didn't get to go to lots of other really cool places most people don't get to visit. So I guess it evens out.
Anyways, I had a customer contact me about creating a couple custom sets for her trip to Disney World around Halloween. Super cool, right? It's got to be so much fun to go there on any holiday, but especially Halloween.
The first set was a Hocus Pocus themed set. I've never really been a huge fan of that movie (I know, blasphemy!), but it was still really fun to create. She wanted four accents; the black flame candle, Thackery Binx (in cat form), the spell book, and Billy Butcherson.
To keep it short, the main colors I used were purple with a glitter top coat (OPI I Vant to Bite Your Neck and Finger Paints Glitter Top Coat), green (L'Oreal New Money), and a really neat black with a slight red shimmer (OPI Midnight in Moscow).
The other set she requested was a Mickey Mouse inspired set. For the thumbs, I used a base of CND Vinylux Grommet and my red striper. The black glitter is Nina Ultra Pro Glam Rock. The red glitter is Wet 'N Wild Fergie No Place Like Home (and one of my favorites!).
I hope you all have a fantastic week!
Showing posts with label commissions. Show all posts
Tuesday, October 13, 2015
Halloween in... Disney World!
labels:
commissions,
Disney,
dots,
Etsy,
fake nails,
french tips,
glitter,
Halloween,
Holiday,
movies
Thursday, October 1, 2015
Roses, Owls, Forests
One of the things I've learned it that I really, really like sculpting with acrylics. It is just so fun to make 3D things that I could never do with polish. Granted, I could never wear the sculpts because I'd catch it on things and pick at it, but they sure do look cool!
A fellow student had a wedding this weekend, so she commissioned me to make her some roses for the occasion. I've really been wanting to learn how to make the roses that are really 3D and just pop out of the nail. They look really pretty. I haven't quite perfected the method to make them quite how I want, but we were both satisfied for the moment!
For me, it worked easiest to make a few individual petals at a time (starting from the inside), attach them, then make a few more, attach them, and so forth until I had the look and size I wanted. I still haven't figured out how to curl the edges, but I'll get there....
The one on the left was my first one. It was huge! Way to big for a nail. We were joking saying that she could make it into an earring. And then I got to thinking that maybe I needed some new products in my shop.....
Last week, the same girl had me paint this cute fall mani on her nails. She fell in love this neat forest design by narmai on Instagram. She also wanted an owl accent, and to make it not so spooky and halloween-ish, we left out the eyes and made the sky more normal.
To make the sky, I used the same ombre method as The Nailasaurus. I made the trees with my black striper. To make the owls, I started with a base of China Glaze Oxygen. Then using a dark brown, Saslly Hansen Complete Salon Manicure Branch Out, I painted two half moon shapes and filled in the space between them. A small one on the cuticle end of the nail, and a more dramatically curved one on the other end. I used OPI ??? to make the belly feathers and Sally Hansen Xtreme Wear Sun Kissed for the beak. The eyes were made with black and white paint, applied with a dotter.
Have a great week!
A fellow student had a wedding this weekend, so she commissioned me to make her some roses for the occasion. I've really been wanting to learn how to make the roses that are really 3D and just pop out of the nail. They look really pretty. I haven't quite perfected the method to make them quite how I want, but we were both satisfied for the moment!
For me, it worked easiest to make a few individual petals at a time (starting from the inside), attach them, then make a few more, attach them, and so forth until I had the look and size I wanted. I still haven't figured out how to curl the edges, but I'll get there....
The one on the left was my first one. It was huge! Way to big for a nail. We were joking saying that she could make it into an earring. And then I got to thinking that maybe I needed some new products in my shop.....
Last week, the same girl had me paint this cute fall mani on her nails. She fell in love this neat forest design by narmai on Instagram. She also wanted an owl accent, and to make it not so spooky and halloween-ish, we left out the eyes and made the sky more normal.
To make the sky, I used the same ombre method as The Nailasaurus. I made the trees with my black striper. To make the owls, I started with a base of China Glaze Oxygen. Then using a dark brown, Saslly Hansen Complete Salon Manicure Branch Out, I painted two half moon shapes and filled in the space between them. A small one on the cuticle end of the nail, and a more dramatically curved one on the other end. I used OPI ??? to make the belly feathers and Sally Hansen Xtreme Wear Sun Kissed for the beak. The eyes were made with black and white paint, applied with a dotter.
Have a great week!
Thursday, October 2, 2014
Rhinestones and Rainbows
I was cleaning out my nail folder this week and I found some custom orders from last month that I never showed you guys.
The first one is a rainbow set I made for a wedding-goer.
I really liked her idea of having one rainbow spreading over 5 fingers instead of one finger you usually see. I think that looks nicer (and it's easier to paint!). I used my favorite cream base (Orly French Manicure Softest White). For the rainbow I used Revlon Colorstay Red Carpet, Sally Hansen Xtreme Wear Sun Kissed, Sally Hansen Xtreme Wear Mellow Yellow, L'Oreal New Money, Sally Hansen Xtreme WEar Blue Me Away, and L'Oreal Royally Reinvented.
This next one is very different from what I normally do. It not only has small 3mm rhintestones, but it also has a huge 4-rhinestone set!
I personally would not want to wear it, but I understand the attraction to it! The biggest beef I had with the whole design was the the larger rhinestone set pokes way out from the nail, probably 2-3mm at some points. For me, I know I would get it caught on everything and loose it withing the first day. But I realize some people are more careful than me. Probably lots more! I ordered the rhinestones from Born Pretty Store. They have a huge selection!
I hope you all have a fantastic weekend!
The first one is a rainbow set I made for a wedding-goer.
I really liked her idea of having one rainbow spreading over 5 fingers instead of one finger you usually see. I think that looks nicer (and it's easier to paint!). I used my favorite cream base (Orly French Manicure Softest White). For the rainbow I used Revlon Colorstay Red Carpet, Sally Hansen Xtreme Wear Sun Kissed, Sally Hansen Xtreme Wear Mellow Yellow, L'Oreal New Money, Sally Hansen Xtreme WEar Blue Me Away, and L'Oreal Royally Reinvented.
This next one is very different from what I normally do. It not only has small 3mm rhintestones, but it also has a huge 4-rhinestone set!
I personally would not want to wear it, but I understand the attraction to it! The biggest beef I had with the whole design was the the larger rhinestone set pokes way out from the nail, probably 2-3mm at some points. For me, I know I would get it caught on everything and loose it withing the first day. But I realize some people are more careful than me. Probably lots more! I ordered the rhinestones from Born Pretty Store. They have a huge selection!
I hope you all have a fantastic weekend!
Sunday, May 4, 2014
Minnie Mouse and Commissions
So I finally made my Minnie Mouse design into an Etsy set! It took me forever to finally get around to it.
I don't have much new to say about it. This is the original post, if you want to read. You can find the set here in my store.
I also have some commissioned sets to show you guys! I was working with the lovely lady that commissioned the sets I showed you all earlier (plaid, blue daisy, black daisy).
I really liked how this one turned out. It seems somewhat Victorian to me, with the stripes and roses. I'm still not satisfied with my ability to make large roses, but it works.
This one was... interesting to make. For whatever reasons, I had the hardest time this one. I had to redo a couple of them and they didn't turn out quite right. But, overall, I'm satisfied and I hope she will be too!
I thought this one turned out really cute! Very light hearted and Springy. (Apparently hearted isn't a word. I tried hearted, lighthearted, and light-hearted, but all those are wrong! Spell check kept giving me heated. You'd think that one of those would be a word, since "light hearted" is a commonly used expression...)
I'm not very talkative tonight, apparently. Which can be nice, I suppose! Makes the post short and sweet. I should have at least one more post for you guys this week. I'm painting my own nails tomorrow, and I will finally update my chevron accent set! I can't believe it's taken me this long to do it...
I hope you all have a fabulous week!
I don't have much new to say about it. This is the original post, if you want to read. You can find the set here in my store.
I also have some commissioned sets to show you guys! I was working with the lovely lady that commissioned the sets I showed you all earlier (plaid, blue daisy, black daisy).
I really liked how this one turned out. It seems somewhat Victorian to me, with the stripes and roses. I'm still not satisfied with my ability to make large roses, but it works.
This one was... interesting to make. For whatever reasons, I had the hardest time this one. I had to redo a couple of them and they didn't turn out quite right. But, overall, I'm satisfied and I hope she will be too!
I thought this one turned out really cute! Very light hearted and Springy. (Apparently hearted isn't a word. I tried hearted, lighthearted, and light-hearted, but all those are wrong! Spell check kept giving me heated. You'd think that one of those would be a word, since "light hearted" is a commonly used expression...)
I'm not very talkative tonight, apparently. Which can be nice, I suppose! Makes the post short and sweet. I should have at least one more post for you guys this week. I'm painting my own nails tomorrow, and I will finally update my chevron accent set! I can't believe it's taken me this long to do it...
I hope you all have a fabulous week!
labels:
commissions,
Disney,
Etsy,
Etsy-to-Fingers,
fake nails,
flowers,
summer
Saturday, April 19, 2014
New Listings!
I have a ton of new listings to show you guys. I have 8 new listings - 5 accents and 3 full sets. It sounds like I've been really busy, but most of these came from doing some cleaning out. I keep all of the nails that I experiment on, so it makes a huge pile! I was going through them to see if found anything to recreate and I found several that I wanted to do more with. I made accent sets out of 5 of them and kept some others out to make into full sets. The only things I actually painted were the 3 new full sets.
Accents first!
This first design started with a beautiful dress. As you might know, I have a ridiculous amount of clothing pinned on my Pinterest. I was looking for some nail-spiration quite a while ago (a year? more?) and I came across this lovely thing in my boards:
Isn't it gorgeous?! I could never wear such a thing (I like to feel more clothed than I would feel in that), but it's just so pretty.
I'm not sure what colors I used then, but if I made it now I would use Finger Paints Sketchy Character as the brown base and my creamy striper for the detail. Here's the listing.
I'm pretty sure this one was inspired by a dress too - I kind of think somewhere around 1850-69, but I could be wrong. In my quick look I didn't find the dress. Whenever I have more time (and if I think of it) I will do a more thorough search.
I have a little more of an idea of what I used for this one. I know the base was Sally Hansen Hard as Nails Sheer Vanilla over white. I don't have that color anymore though, so if I made it now I would use Revlon Colorstay Pale Cashmere, which is a very similar color. For the 'spears' I would use Finger Paints Sketchy Character and Nina Ultra Pro Beige-A Vu, with Sally Hansen Complete Salon Manicure Butterscotch, probably. You can find this set here in my store.
This is a somewhat more recent design - recent enough to be in this blog. It was part of my Doll Challenge, where I painted designs based off of the clothing of my American Girl Girls of Many Lands dolls.
It was based off of this doll from Tudor England.
They are such pretty dolls. Very detailed and pretty darn accurate, from what I know of fashions.
For this design, I used CoverGirl Boundless Color Plum Pudding for the detail and on my other nails. For the base of the accent, I used my cream striper. That proved to be super time consuming and annoying (it took forever to cover my nail, forever to dry...), so I think I'll use Revlon Colorstay Pale Cashmere. It's a really close match to this as well. Here's the link to the listing.
This is another older creation. I think it was inspired by a nail pin. I don't know which one, but if you ever look through my Pinterest boards you'll probably find it.
For this one I originally used a white base (which would currently be Finger Paints Paper Mache). For the vine stem and flower petals I used a pink acrlylic paint. The leaves were made with a Sally Hansen Xtreme Wear (Mint Sorbet?). I don't have that color anymore, so I'd use Revlon Brilliant Strength Entice. You can find the set here in my shop.
This one is a super recent design. I made it a few weeks ago for a customer to choose from in a custom order. She chose a different design, so I decided to go ahead an put up this design. (If I want to put a custom design up in my shop permanently, I like to wait a while before I do that since they have to pay so much extra for a custom set. It seems a little fairer that way to me.)
I got this idea from some pins we both collected for design possibilities. ...Which I conveniently can't find to show you guys. I think I searched "triangle nails" or "geometric nails," I don't remember which.
I used L'Oreal Walk on the Beach as the base. For the triangles I used Sally Hansen Xtreme Wear Cherry Red, China Glaze Recycle, China Glaze Pelican Grey, and Pure Ice Bikini. Then I outlined the triangles with my white striper (Stripe Rite). Here's the link to the listing.
For the sake of space, I think I will quit here for now. This is all of the new accent sets. I'll blog about the new full sets tomorrow. I also have a fun new Easter design to show you guys too! I'm super excited about it and can't wait to blog about it.
I hope you all have a fantastic Easter!
Accents first!
This first design started with a beautiful dress. As you might know, I have a ridiculous amount of clothing pinned on my Pinterest. I was looking for some nail-spiration quite a while ago (a year? more?) and I came across this lovely thing in my boards:
Isn't it gorgeous?! I could never wear such a thing (I like to feel more clothed than I would feel in that), but it's just so pretty.
I'm not sure what colors I used then, but if I made it now I would use Finger Paints Sketchy Character as the brown base and my creamy striper for the detail. Here's the listing.
I'm pretty sure this one was inspired by a dress too - I kind of think somewhere around 1850-69, but I could be wrong. In my quick look I didn't find the dress. Whenever I have more time (and if I think of it) I will do a more thorough search.
I have a little more of an idea of what I used for this one. I know the base was Sally Hansen Hard as Nails Sheer Vanilla over white. I don't have that color anymore though, so if I made it now I would use Revlon Colorstay Pale Cashmere, which is a very similar color. For the 'spears' I would use Finger Paints Sketchy Character and Nina Ultra Pro Beige-A Vu, with Sally Hansen Complete Salon Manicure Butterscotch, probably. You can find this set here in my store.
This is a somewhat more recent design - recent enough to be in this blog. It was part of my Doll Challenge, where I painted designs based off of the clothing of my American Girl Girls of Many Lands dolls.
It was based off of this doll from Tudor England.
They are such pretty dolls. Very detailed and pretty darn accurate, from what I know of fashions.
For this design, I used CoverGirl Boundless Color Plum Pudding for the detail and on my other nails. For the base of the accent, I used my cream striper. That proved to be super time consuming and annoying (it took forever to cover my nail, forever to dry...), so I think I'll use Revlon Colorstay Pale Cashmere. It's a really close match to this as well. Here's the link to the listing.
This is another older creation. I think it was inspired by a nail pin. I don't know which one, but if you ever look through my Pinterest boards you'll probably find it.
For this one I originally used a white base (which would currently be Finger Paints Paper Mache). For the vine stem and flower petals I used a pink acrlylic paint. The leaves were made with a Sally Hansen Xtreme Wear (Mint Sorbet?). I don't have that color anymore, so I'd use Revlon Brilliant Strength Entice. You can find the set here in my shop.
This one is a super recent design. I made it a few weeks ago for a customer to choose from in a custom order. She chose a different design, so I decided to go ahead an put up this design. (If I want to put a custom design up in my shop permanently, I like to wait a while before I do that since they have to pay so much extra for a custom set. It seems a little fairer that way to me.)
I got this idea from some pins we both collected for design possibilities. ...Which I conveniently can't find to show you guys. I think I searched "triangle nails" or "geometric nails," I don't remember which.
I used L'Oreal Walk on the Beach as the base. For the triangles I used Sally Hansen Xtreme Wear Cherry Red, China Glaze Recycle, China Glaze Pelican Grey, and Pure Ice Bikini. Then I outlined the triangles with my white striper (Stripe Rite). Here's the link to the listing.
For the sake of space, I think I will quit here for now. This is all of the new accent sets. I'll blog about the new full sets tomorrow. I also have a fun new Easter design to show you guys too! I'm super excited about it and can't wait to blog about it.
I hope you all have a fantastic Easter!
labels:
acrylic,
commissions,
dolls,
dots,
Etsy,
fake nails,
fashion,
flowers,
historical clothing,
tribal
Thursday, April 3, 2014
Nautical
What do you all think of my new layout? I thought it was time for a change. My old design was never quite what I wanted, so I changed it! I might still fiddle with my logo, we'll see. I hope you guys like it! If not, well, you're stuck with it for now. :)
I've got another design to show you already! Hopefully all these updates is a good sign; maybe I'll finally become a more consistent blogger. Maybe. If we're both lucky.
Another Etsy listing this week - my nautical set. You might have seen them before, I blogged about it a few months ago when I first made the set for Etsy. It's a very summery design, which I love! It's finally warming up here and I'm so excited!
I had planned to use tape to mark of the stripes like I did the first time, but I forgot to paint the white the night before. I always have a problem with the polish coming off with the tape if I don't paint the base layer several hours before. Maybe it's just me, I don't know. I haven't heard much about other people having this problem...
I used Finger Paints Paper Mache and Stripe Rite Red for the stripes. The yellow was Covergirl Outlast Lemon Drop and the blue Sally Hansen Complete Salon Manicure Resurrection. For the anchor I used Sally Hansen Hard As Nails Pumping Iron.
It didn't turn out quite like I had hoped - my nails are so much smaller than the fakes I use to paint my demo sets for Etsy! It makes it a lot harder than you would think to do something the first time on a larger nail and then try to paint it on a small one. It was hard to get the proportions right. My anchor turned out a lot better this time though, I think.
I had been inspired by a few pins I had come across while looking up design ideas for a custom order over in my Etsy shop. I found some really cute designs with polka dots and gold glitter mixed in with the stripes and/or anchor. If I ever make another version of this I'd definitely have to include those!
That's all my news for now. I probably won't have anything new until late next week. I'm taking a break from both jobs on my next day off. Then it's back to work as usual! I have another pending custom design that I think you all with love! It's pretty trendy and cute!
Have a wonderful weekend guys!
I've got another design to show you already! Hopefully all these updates is a good sign; maybe I'll finally become a more consistent blogger. Maybe. If we're both lucky.
Another Etsy listing this week - my nautical set. You might have seen them before, I blogged about it a few months ago when I first made the set for Etsy. It's a very summery design, which I love! It's finally warming up here and I'm so excited!
I had planned to use tape to mark of the stripes like I did the first time, but I forgot to paint the white the night before. I always have a problem with the polish coming off with the tape if I don't paint the base layer several hours before. Maybe it's just me, I don't know. I haven't heard much about other people having this problem...
I used Finger Paints Paper Mache and Stripe Rite Red for the stripes. The yellow was Covergirl Outlast Lemon Drop and the blue Sally Hansen Complete Salon Manicure Resurrection. For the anchor I used Sally Hansen Hard As Nails Pumping Iron.
It didn't turn out quite like I had hoped - my nails are so much smaller than the fakes I use to paint my demo sets for Etsy! It makes it a lot harder than you would think to do something the first time on a larger nail and then try to paint it on a small one. It was hard to get the proportions right. My anchor turned out a lot better this time though, I think.
I had been inspired by a few pins I had come across while looking up design ideas for a custom order over in my Etsy shop. I found some really cute designs with polka dots and gold glitter mixed in with the stripes and/or anchor. If I ever make another version of this I'd definitely have to include those!
That's all my news for now. I probably won't have anything new until late next week. I'm taking a break from both jobs on my next day off. Then it's back to work as usual! I have another pending custom design that I think you all with love! It's pretty trendy and cute!
Have a wonderful weekend guys!
labels:
commissions,
dots,
Etsy,
Etsy-to-Fingers,
fake nails,
nautical,
stripes,
summer,
tape
Tuesday, March 25, 2014
Kitties!!!
I painted one of my favorite subjects yesterday, and I'm sure you can guess what it is... Cats!! I could easily become a crazy cat lady if I let myself go. Maybe when I'm old and crazy I can finally fulfill my destiny. :)
This is another in what I have dubbed the Recreate Sarah's Etsy Designs On Fingers Project, or RSEDFP. Like anyone would remember RSEDFP. :D You can find the original design here in my store.
Aren't they cute? They look a little mischievous, I think. And I thought it only right to use my cat coat hook as my nail prop this time. :) The original idea came from a couple different pins, I think. I blogged about it several months ago when I made the Etsy set, and I think the inspiration was listed there.
When I made these I used a bunch of different colors. I'm going to pull the lazy card and not list them all. If you want to know what they were though, just ask me and I'll be glad to dig them out and tell you!
Pardon the poor execution of this hand... It was painted by my left hand, as I'm sure you could guess. It turned out better than I thought though - I haven't made my left hand paint anything too crazy in several weeks. It's really not that bad, but the fat outlines just bother me to no end. I can't help it!
These kitties are pretty easy to make. You just make a slightly pudgy stick with pointy ears, then you outline it (I used my handy dandy striper, like always). Next I sponge/dot on their bellies or faces, depending on what the cat is wanting (and yes, they do demand certain things!). Then I paint their faces - eyes first with a dotter, then the whiskers, nose, and mouth. You can paint their faces on first if you like, it really doesn't matter.
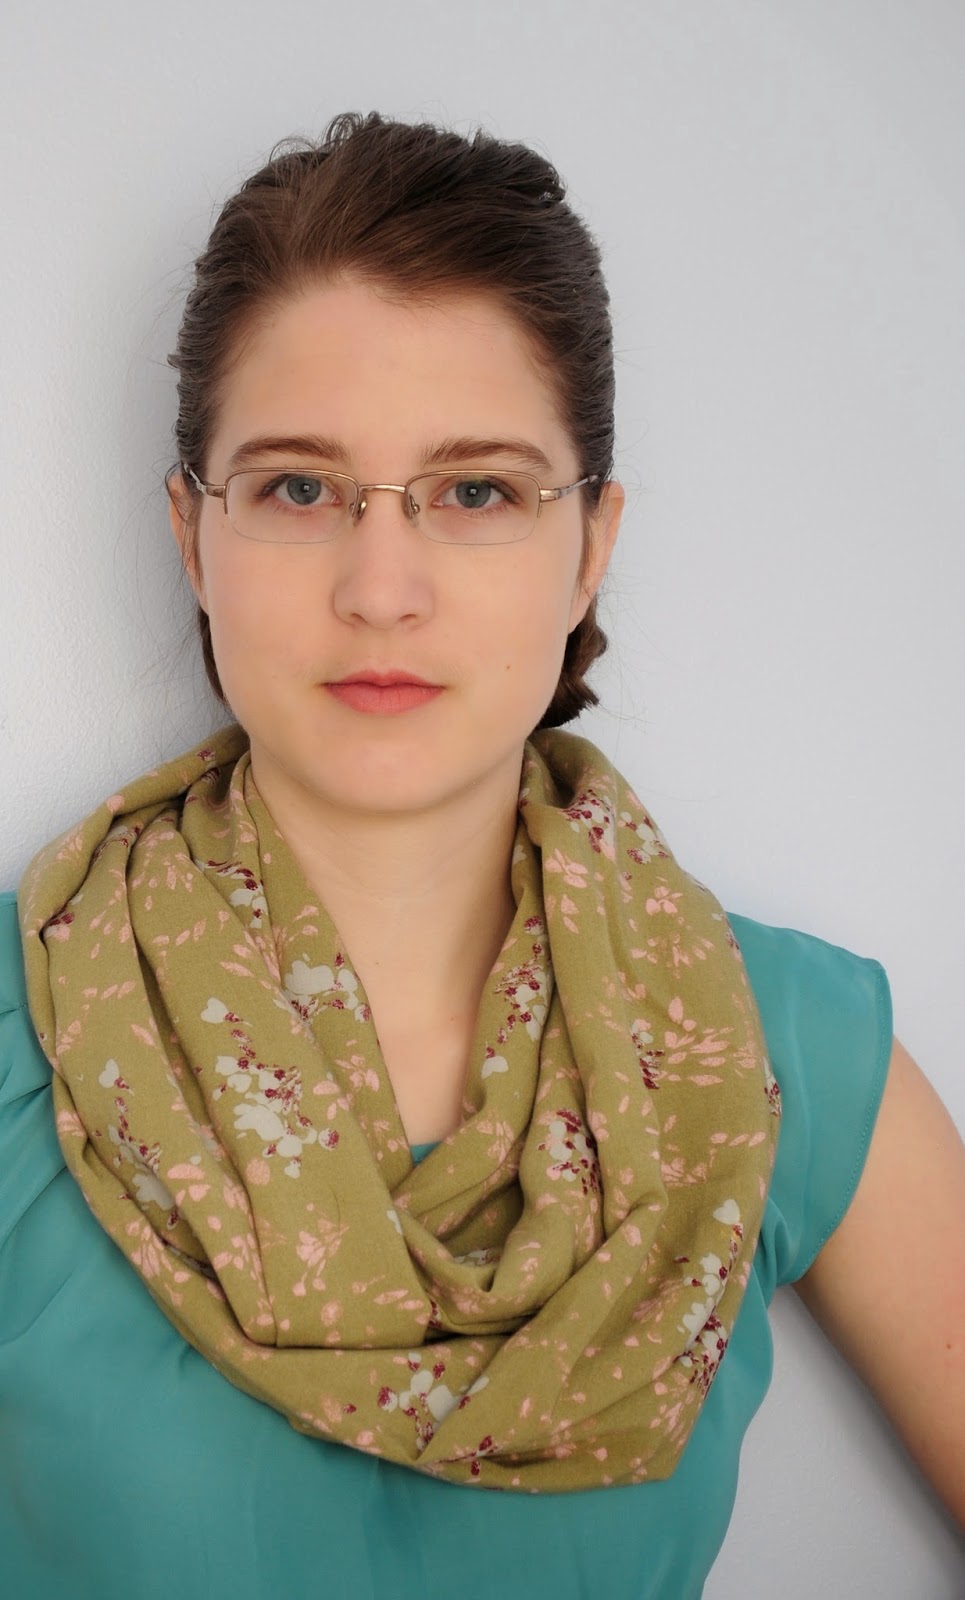
In other news, I've been a busy crafter this week! I've made a sleeve for my laptop (it's all but done, I just need to attach the velcro!), a coin purse (which needs some help...), an infinity scarf, and a blanket for my friend! Just because I can, I'm going to show them off to you guys.
Here's the laptop sleeve. It's predictably made with a cat fabric. And, of course, the buttons had to be little fishies!
The scarf. I'm pretty proud of it. It's cute and I'm actually being trendy for once! (This will probably never happen again.)
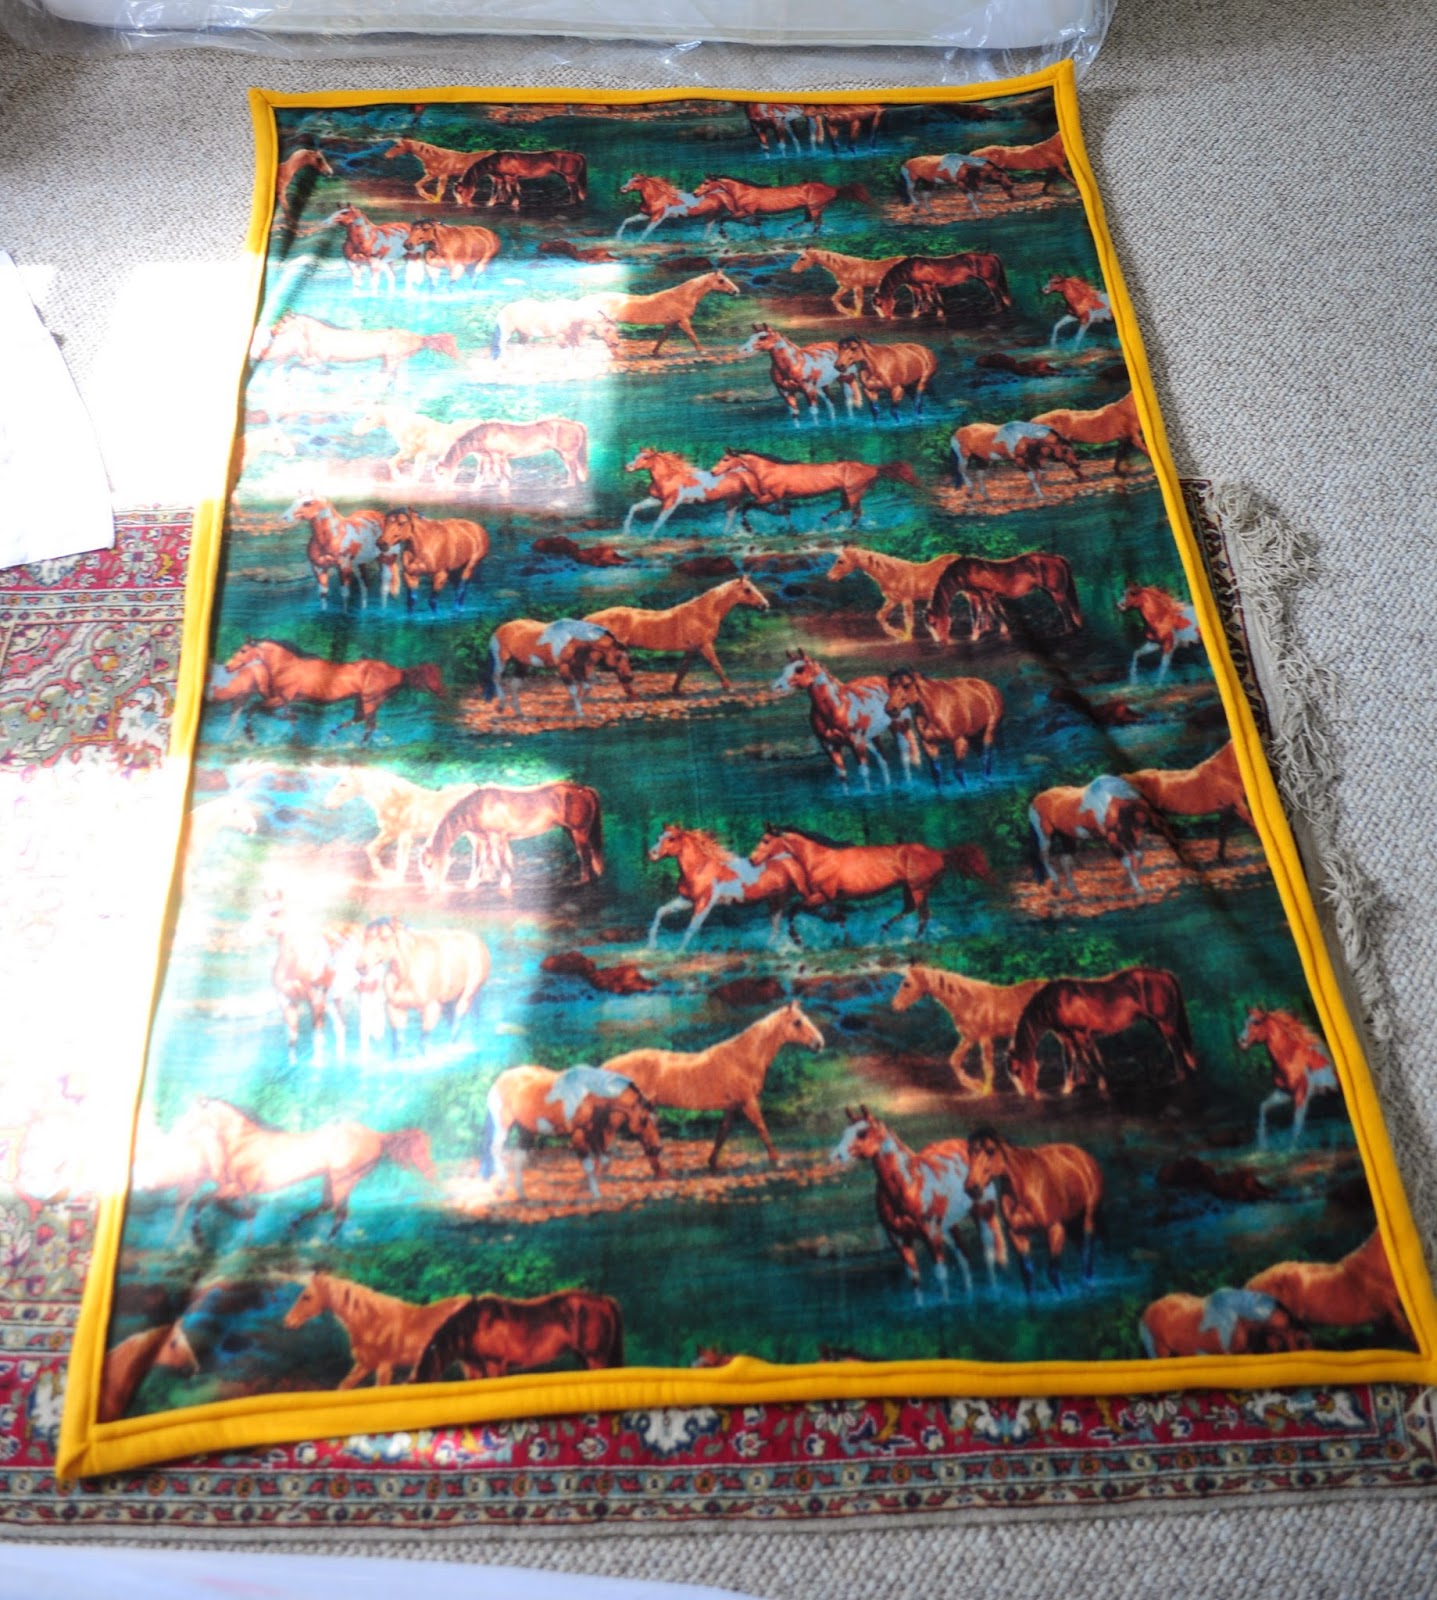
And the blanket. I made one for myself several months ago (I got it super cheap! $15 for 2.5 yards of 2 fleeces - everything was on sale and I had my employee discount on top of it). My friend loves horses so I promised to make her a horse blanket like mine. I finally found some good horse fleece last week! Her's was pretty cheap too, although not as good a deal as mine - her's was $27.
My blanket is.... cat fleece! I bet you guessed! I have this theme going on in this post it seems....
Unfortunately I don't have a picture of the coin purse yet. It has some problems... I might or might not have made it a little bit too small for the sew-in latch...
That's all my news for now! I have some more earrings to show you guys, but I keep forgetting to blog about them... I'll get around to it eventually!
Hope you all have a wonderful week!
This is another in what I have dubbed the Recreate Sarah's Etsy Designs On Fingers Project, or RSEDFP. Like anyone would remember RSEDFP. :D You can find the original design here in my store.
Aren't they cute? They look a little mischievous, I think. And I thought it only right to use my cat coat hook as my nail prop this time. :) The original idea came from a couple different pins, I think. I blogged about it several months ago when I made the Etsy set, and I think the inspiration was listed there.
When I made these I used a bunch of different colors. I'm going to pull the lazy card and not list them all. If you want to know what they were though, just ask me and I'll be glad to dig them out and tell you!
Pardon the poor execution of this hand... It was painted by my left hand, as I'm sure you could guess. It turned out better than I thought though - I haven't made my left hand paint anything too crazy in several weeks. It's really not that bad, but the fat outlines just bother me to no end. I can't help it!
These kitties are pretty easy to make. You just make a slightly pudgy stick with pointy ears, then you outline it (I used my handy dandy striper, like always). Next I sponge/dot on their bellies or faces, depending on what the cat is wanting (and yes, they do demand certain things!). Then I paint their faces - eyes first with a dotter, then the whiskers, nose, and mouth. You can paint their faces on first if you like, it really doesn't matter.
In other news, I've been a busy crafter this week! I've made a sleeve for my laptop (it's all but done, I just need to attach the velcro!), a coin purse (which needs some help...), an infinity scarf, and a blanket for my friend! Just because I can, I'm going to show them off to you guys.
Here's the laptop sleeve. It's predictably made with a cat fabric. And, of course, the buttons had to be little fishies!
The scarf. I'm pretty proud of it. It's cute and I'm actually being trendy for once! (This will probably never happen again.)
And the blanket. I made one for myself several months ago (I got it super cheap! $15 for 2.5 yards of 2 fleeces - everything was on sale and I had my employee discount on top of it). My friend loves horses so I promised to make her a horse blanket like mine. I finally found some good horse fleece last week! Her's was pretty cheap too, although not as good a deal as mine - her's was $27.
My blanket is.... cat fleece! I bet you guessed! I have this theme going on in this post it seems....
Unfortunately I don't have a picture of the coin purse yet. It has some problems... I might or might not have made it a little bit too small for the sew-in latch...
That's all my news for now! I have some more earrings to show you guys, but I keep forgetting to blog about them... I'll get around to it eventually!
Hope you all have a wonderful week!
labels:
animals,
cats,
commissions,
dots,
Etsy,
Etsy-to-Fingers,
kitties
Sunday, March 23, 2014
Commissions
I had the privilege of working with a wonderful lady on some custom orders last week! She was tons of fun to work with and found some of the cutest designs! I made 3 sets for her:
The plaid is a little wonky, but I actually like it that way. It's more pronounced in the picture, but in person it really looks pretty nice. I used Finger Paints Paper Mache for the white and Finger Paints Paint Me Happy for the pink.
This one was fun to make! It's just your average daisy design, but it looks really nice and sophisticated. I used Sally Hansen Xtreme Wear Black Out for the black. The white was Finger Paints Paper Mache again, and Covergirl Outlast Lemon Drop for yellow.
To make the daisies I basically made a simple snowflake/star. I painted a vertical stripe, a horizontal stripe (making a plus sign), then I made the two final diagonal stripes (making an x on top of the +). Then I used my dotter to make the center.
This design is my favorite! Dots and daisies look so cute together! Everything is pretty much the same as the black daisy design, I just used Pure Ice Bikini as the base instead of Black Out. I used the dotter for the dots, as usual.
I've had an extremely busy weekend this time around; I worked all three days (Friday-Sunday) and we were packed! JoAnn's was running a pretty good coupon so every one had to rush in an buy stuff. All the rude people came Friday, so it ended up being a pretty crappy day. On the plus side, that meant that we didn't have to deal with any other rude people the rest of the weekend, which was nice.
Luckily, I have the next two days off! It'll be a much needed break. I'm hoping to get a new set or two painted for my Etsy sometime in the next two days. I'm also working on making a blanket for one of my friends and trying to finish up various other unfinished projects (I have so many!), so we'll see if I get more than just my own nails done.
That's all my news for tonight! I hope you all have a fantastic week!
The plaid is a little wonky, but I actually like it that way. It's more pronounced in the picture, but in person it really looks pretty nice. I used Finger Paints Paper Mache for the white and Finger Paints Paint Me Happy for the pink.
This one was fun to make! It's just your average daisy design, but it looks really nice and sophisticated. I used Sally Hansen Xtreme Wear Black Out for the black. The white was Finger Paints Paper Mache again, and Covergirl Outlast Lemon Drop for yellow.
To make the daisies I basically made a simple snowflake/star. I painted a vertical stripe, a horizontal stripe (making a plus sign), then I made the two final diagonal stripes (making an x on top of the +). Then I used my dotter to make the center.
This design is my favorite! Dots and daisies look so cute together! Everything is pretty much the same as the black daisy design, I just used Pure Ice Bikini as the base instead of Black Out. I used the dotter for the dots, as usual.
I've had an extremely busy weekend this time around; I worked all three days (Friday-Sunday) and we were packed! JoAnn's was running a pretty good coupon so every one had to rush in an buy stuff. All the rude people came Friday, so it ended up being a pretty crappy day. On the plus side, that meant that we didn't have to deal with any other rude people the rest of the weekend, which was nice.
Luckily, I have the next two days off! It'll be a much needed break. I'm hoping to get a new set or two painted for my Etsy sometime in the next two days. I'm also working on making a blanket for one of my friends and trying to finish up various other unfinished projects (I have so many!), so we'll see if I get more than just my own nails done.
That's all my news for tonight! I hope you all have a fantastic week!
labels:
commissions,
dots,
Etsy,
fake nails,
flowers,
summer
Thursday, January 9, 2014
Dots, Leaves, and News
I hope you all had a fantastic Christmas and New Year! I really enjoyed my time with the family!
A few days after Christmas I had the wonderful opportunity to do and art trade with the lovely Anjuli over at Digital Designs on Etsy (https://www.etsy.com/shop/digitaldesignss). It was tons of fun! I made her some red snowflake nails and she made me this awesome 'R' that has the names of my relatives on the Roberts side of my family.
She does fantastic work, so if you're into this sort of thing you should definitely go check her out!
I also got to paint several people's nails over the past few weeks. While this isn't something I normally do - I don't know much about anything except painting; I don't do any of the prep work you get at a salon (mostly I'm just not to that point yet and don't want to get into that to often. Yet.) - I really enjoyed doing it!
Top left: Some cute little wintery penguins with bows on their heads
Top right: Christmas minions
Bottom left: Snowman, glitter, and snowflakes
Bottom middle: Santa's belt
Bottom right: Santa's face
I hadn't done anything on my own nails until this week! Partially because of the gel polish that stayed for two weeks, but mostly because I was busy running back and forth between work and visiting with family. This Christmas was so much busier than the last (for me, at least), but it was still just as great. I was going to do the winter birds like I had originally planned, but lack of time and design distractions made me paint something else! I found this cool design when I was looking through some business card templates at moo.com.
I fell in love with it! So I painted my own version of it on my nails a few days ago. I knew I only wanted it as an accent nail, but I didn't want to leave the other nails completely plain. I couldn't really think of anything great, so I slapped some dots on there!
I also had this glitter that I was dying to use, so I put some of it on my left hand.
I used Sally Hansen Salon Effects Butterscotch and Revlon Colorstay Jungle for the base coats. For the leaves I used Loreal New Money and Tea and Crumpets, then Revlon Colorstay Jungle for the stem. For the dots I used the same as for the leaves, plus the Butterscotch. On my left hand the glitter was an Orly Mini Glitter. I've yet to find a name on the bottle, but the number is 0125112.
That's it for now. I have a ton more to show you (I've made up some new sets for my Etsy!), but I don't want to make this post ridiculously long. Hope you all have an wonderful day!
A few days after Christmas I had the wonderful opportunity to do and art trade with the lovely Anjuli over at Digital Designs on Etsy (https://www.etsy.com/shop/digitaldesignss). It was tons of fun! I made her some red snowflake nails and she made me this awesome 'R' that has the names of my relatives on the Roberts side of my family.
She does fantastic work, so if you're into this sort of thing you should definitely go check her out!
I also got to paint several people's nails over the past few weeks. While this isn't something I normally do - I don't know much about anything except painting; I don't do any of the prep work you get at a salon (mostly I'm just not to that point yet and don't want to get into that to often. Yet.) - I really enjoyed doing it!
Top left: Some cute little wintery penguins with bows on their heads
Top right: Christmas minions
Bottom left: Snowman, glitter, and snowflakes
Bottom middle: Santa's belt
Bottom right: Santa's face
I hadn't done anything on my own nails until this week! Partially because of the gel polish that stayed for two weeks, but mostly because I was busy running back and forth between work and visiting with family. This Christmas was so much busier than the last (for me, at least), but it was still just as great. I was going to do the winter birds like I had originally planned, but lack of time and design distractions made me paint something else! I found this cool design when I was looking through some business card templates at moo.com.
I fell in love with it! So I painted my own version of it on my nails a few days ago. I knew I only wanted it as an accent nail, but I didn't want to leave the other nails completely plain. I couldn't really think of anything great, so I slapped some dots on there!
I also had this glitter that I was dying to use, so I put some of it on my left hand.
I used Sally Hansen Salon Effects Butterscotch and Revlon Colorstay Jungle for the base coats. For the leaves I used Loreal New Money and Tea and Crumpets, then Revlon Colorstay Jungle for the stem. For the dots I used the same as for the leaves, plus the Butterscotch. On my left hand the glitter was an Orly Mini Glitter. I've yet to find a name on the bottle, but the number is 0125112.
That's it for now. I have a ton more to show you (I've made up some new sets for my Etsy!), but I don't want to make this post ridiculously long. Hope you all have an wonderful day!
Wednesday, August 21, 2013
Orange Flowers
I've made some more nails for Etsy! Well, indirectly for Etsy, anyway. I painted them for a friend of mine who is going to Hawai'i next month. She wanted some beachy/tropical nails that weren't too cutesy, so I made her this set. (You can find them here on Etsy)
She's going to be there for two weeks, so I made her this set, and the a set like the ones I made for the bridesmaids at my brother's wedding. To make the flowers, I used my own version of the one-stroke stuff, which isn't really one stroke at all... But it works!
In other nail news, I haven't really been doing much with my nails. I've been busy with work and other junk, so I've been slacking on nail designs... Hopefully I'll have time this weekend, but it might not be until next weekend... :(
I will be continuing my Doll series though! I've got about 4 or 5 more dolls I want to design some nails after!
Have a great rest of the week!
She's going to be there for two weeks, so I made her this set, and the a set like the ones I made for the bridesmaids at my brother's wedding. To make the flowers, I used my own version of the one-stroke stuff, which isn't really one stroke at all... But it works!
In other nail news, I haven't really been doing much with my nails. I've been busy with work and other junk, so I've been slacking on nail designs... Hopefully I'll have time this weekend, but it might not be until next weekend... :(
I will be continuing my Doll series though! I've got about 4 or 5 more dolls I want to design some nails after!
Have a great rest of the week!
labels:
commissions,
Etsy,
fake nails,
flowers,
french tips
Tuesday, July 16, 2013
I Now Have A Sister!!
So as you might know, last week was all about getting ready for my brother's wedding. I talked about it a little in this post and the one before it. The wedding was Saturday and everything went really well! No major mishaps, and no crazy brides/moms/grooms/anyone. And now I have a sister! Finally! :)
Anyways, I don't really have any new nail designs for you guys yet (I've still got what remains of my bridesmaids nail design on), but I do have some nail-related stuff to show you all. Just because I can, I thought I'd show you guys how I packaged the other bridesmaids' fake nails. I'm a little proud of the packaging. Just a little. :)
I conveniently had two of the small boxes I use for my Etsy store at home, so I spruced them up a little.
I wish I could do this for my Etsy orders, but I think the flowers would come off or get ruined or something. To make the flowers, I cut of a length of a paper streamer, rolled it, then glued it (I used regular old Elmer's glue). Then I kind of did the same thing to make the leaves, except I left a corner un-rolled. I used water colors to make it green, but I'm sure just a green streamer would work too (I only had white). Then I used my trusty old Elmer's glue to glue everything to the box!
Then, as a nice touch (I do include this in my Etsy orders), I wrote on some paper!
Usually my Etsy orders say something boring like 'Thanks for the order!' But now I might do something more like this instead.... I used some sort of fancy border/hole punch I bought at Micheal's and then wrote on them with my colorful inks! (I don't think I've mentioned this before, but I love calligraphy/illuminations and inks and older looking calligraphy pens!)
Then, underneath it all are the nails. They don't always get to the final location looking this neat, but I do try to keep them in order!
And that's about it! I don't usually use red boxes, because on my Etsy orders I use a ribbon that is a pretty teal-ish color that looks awful with the red. But red was what Hobby Lobby had, so red was what I got! And it looks fine with white flowers, so that worked out great. :)
Well, that's about it for now. I should have another nail design sometime this week. I'm going to the aquarium with my cousin, so I think I'm going to make some fishy nails! I've made some Finding Nemo nails for my Etsy store, so I might do those since I haven't painted that on my actual nails yet. Or I might do something different, we'll see!
Have a lovely day/night guys!
here's a wonderfully grainy picture I stole from facebook of the newlyweds :)
Anyways, I don't really have any new nail designs for you guys yet (I've still got what remains of my bridesmaids nail design on), but I do have some nail-related stuff to show you all. Just because I can, I thought I'd show you guys how I packaged the other bridesmaids' fake nails. I'm a little proud of the packaging. Just a little. :)
I conveniently had two of the small boxes I use for my Etsy store at home, so I spruced them up a little.
I wish I could do this for my Etsy orders, but I think the flowers would come off or get ruined or something. To make the flowers, I cut of a length of a paper streamer, rolled it, then glued it (I used regular old Elmer's glue). Then I kind of did the same thing to make the leaves, except I left a corner un-rolled. I used water colors to make it green, but I'm sure just a green streamer would work too (I only had white). Then I used my trusty old Elmer's glue to glue everything to the box!
Then, as a nice touch (I do include this in my Etsy orders), I wrote on some paper!
Usually my Etsy orders say something boring like 'Thanks for the order!' But now I might do something more like this instead.... I used some sort of fancy border/hole punch I bought at Micheal's and then wrote on them with my colorful inks! (I don't think I've mentioned this before, but I love calligraphy/illuminations and inks and older looking calligraphy pens!)
Then, underneath it all are the nails. They don't always get to the final location looking this neat, but I do try to keep them in order!
And that's about it! I don't usually use red boxes, because on my Etsy orders I use a ribbon that is a pretty teal-ish color that looks awful with the red. But red was what Hobby Lobby had, so red was what I got! And it looks fine with white flowers, so that worked out great. :)
Well, that's about it for now. I should have another nail design sometime this week. I'm going to the aquarium with my cousin, so I think I'm going to make some fishy nails! I've made some Finding Nemo nails for my Etsy store, so I might do those since I haven't painted that on my actual nails yet. Or I might do something different, we'll see!
Have a lovely day/night guys!
labels:
commissions,
Etsy,
flowers,
french tips,
projects,
updates,
wedding
Thursday, May 30, 2013
Wedding!!
No nails today, just fun and exciting wedding stuff!!
Here are some of the pictures I promised from the wedding last week! I think I should warn you - there are going to be a billion pictures in this post!
As I mentioned about a week and a half ago in this post, this is from one of my best friend's wedding! The venue was absolutely gorgeous! It was in the backyard of one of the ladies from our church. Her yard and house are absolutely beautiful!
Isn't that wonderful?! I would absolutely love to have a yard like that!
Her decor was beautiful too! She didn't have much in the backyard (who needs to add anything to that?), but the reception was up the hill and her decorations were amazing! Here are a few of the pictures I took:
Here are two of my favorite pictures of their rings! Her ring boxes were full of moss and were so pretty!
And last but not least, here are some pictures of the lovely bride (and groom)!
Hope you guys like it! It was a fun experience for me even though it was extremely nerve wracking!
Here are some of the pictures I promised from the wedding last week! I think I should warn you - there are going to be a billion pictures in this post!
As I mentioned about a week and a half ago in this post, this is from one of my best friend's wedding! The venue was absolutely gorgeous! It was in the backyard of one of the ladies from our church. Her yard and house are absolutely beautiful!
Isn't that wonderful?! I would absolutely love to have a yard like that!
Her decor was beautiful too! She didn't have much in the backyard (who needs to add anything to that?), but the reception was up the hill and her decorations were amazing! Here are a few of the pictures I took:
Lavender was her flower for her bouquet and everything else.
These had wedding pictures from the older generations.
This is a few of her table decorations! They were all so pretty!
Isn't this cool? She had a magnifying glass on one of the tables and I just had to take this picture!
Her cake platter! It's an old drawer - isn't that neat?!
Her guest book was one of my favorite things! She used a tall cage thing and had people sign in on tags and tie them to the cage!
Here are two of my favorite pictures of their rings! Her ring boxes were full of moss and were so pretty!
And last but not least, here are some pictures of the lovely bride (and groom)!
Some pictures from before the ceremony
This is one of the first look pictures we took
Another from before the ceremony. Aren't they cute?!
The first kiss!!
Just after they were officially married!
Hope you guys like it! It was a fun experience for me even though it was extremely nerve wracking!
labels:
commissions,
photography,
rambling,
wedding
Subscribe to:
Posts (Atom)